Configuring MDaemon's Attachment Linking feature for inbound or outbound messages
Attachment Linking is a feature that makes it possible for MDaemon to remove attachments from messages, store them in a designated location, and then place URL links to the files in each message from which they are extracted.
Follow the steps below enable Attachment Linking in MDaemon.
- Open MDaemon
- Select Setup
- Click Web & IM Services...
- Select Attachment Linking
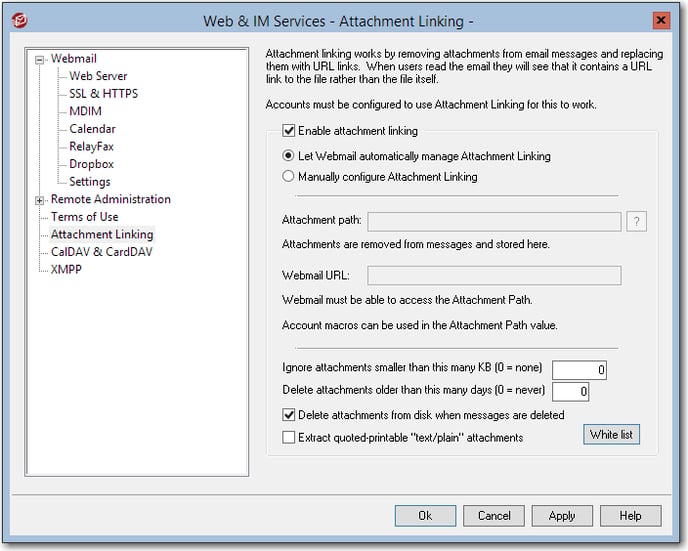
- Select Enable Attachment Linking
- Choose Let Webmail automatically manage attachment linking or Manually configure Attachment Linking
- If manually configuring Attachment Linking, the Attachment Path can be modified and Webmail URL entered.
- The default attachment path syntax is as follows; \MDaemon\Attachments\$DOMAIN$\$USERNAME$
- Enter the value to Ignore attachments smaller than this many KB (0 = none)
- Enter the value to Delete attachments older than this many days (0 = none)
- (Optional) Check Delete attachments from disk when messages are deleted
- (Optional) Check Extract quoted-printable "text/plain" attachments
- By default, quoted printable text/plain attachments will not be extracted.
- Click the White list button to configure file names that should not be extracted.
- One file name per line.
- No wild-cards.
- Click OK
Once enabled, Inbound and/or Outbound Attachment Linking can be enabled per-account using the account editor or using groups in the Groups and Templates manager.
To enable Attachment Linking for Inbound/Outbound Messages per user.
- Open MDaemon
- Select Accounts
- Select Edit Accounts
- Select the account being configured to use outbound Attachment Linking
- Select OK
- Select Attachments
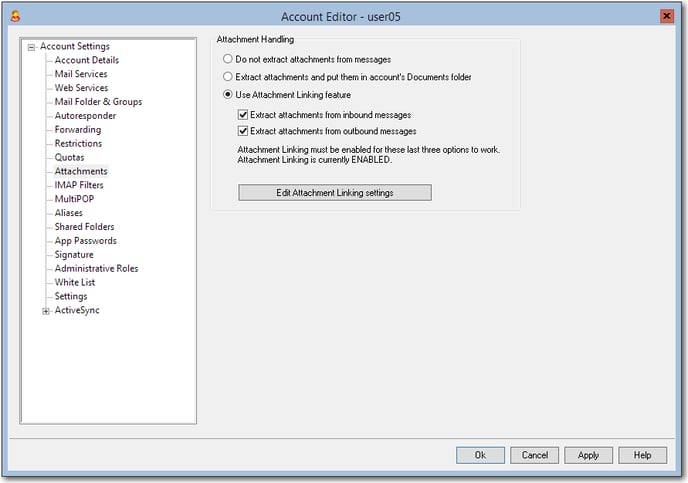
- Click Use Attachment linking feature
- Check Extract attachments from inbound messages and/or Extract attachments from outbound messages
- Select OK
Follow the steps below to create a Template, assign an Attachments configuration to the Template, create a Group, assign user's to the group, and assign the Template to a Group.
- Open MDaemon
- Select Accounts
- Select Groups & Templates
- Select Template Manager
- Click New Template
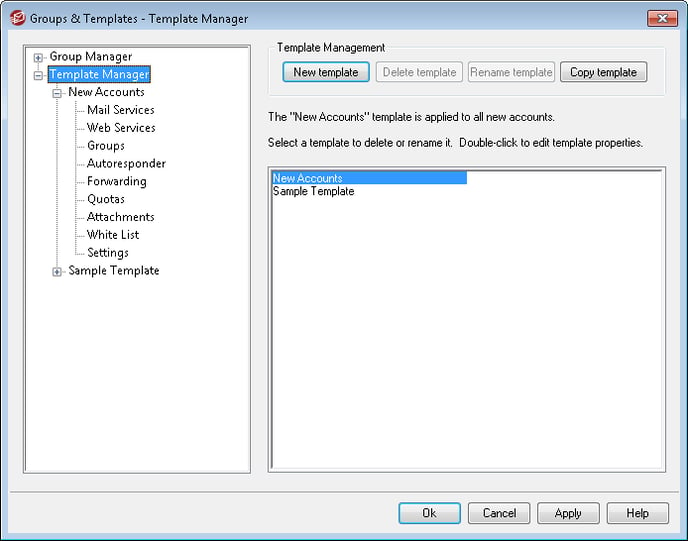
- Create a template name.
- Click Ok
- Expand the options next to the template name (+ icon).
- Select Attachments
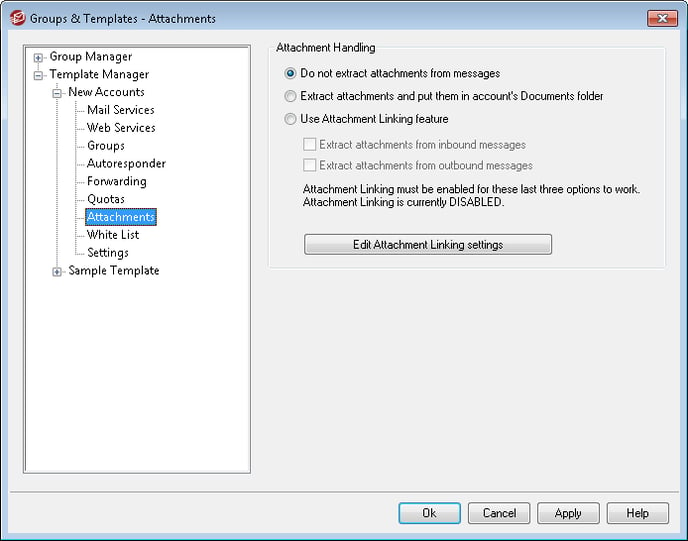
- Click Use Attachment Linking Feature
- Check Extract attachments from inbound messages and/or Extract attachments from outbound messages
- Click Ok
- Click Group Manager
- Click New Group
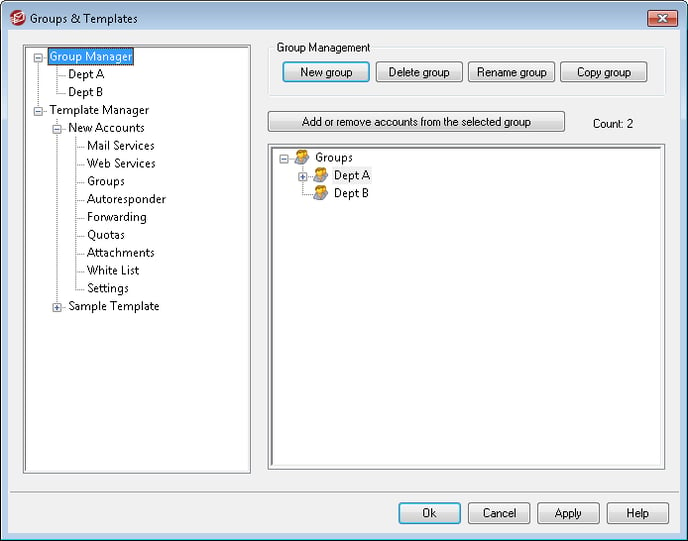
- Create a group name.
- Click Ok
- Click the group in the Groups list
- Select Add or remove accounts from the selected group
- Choose which users/domains to add to the group.
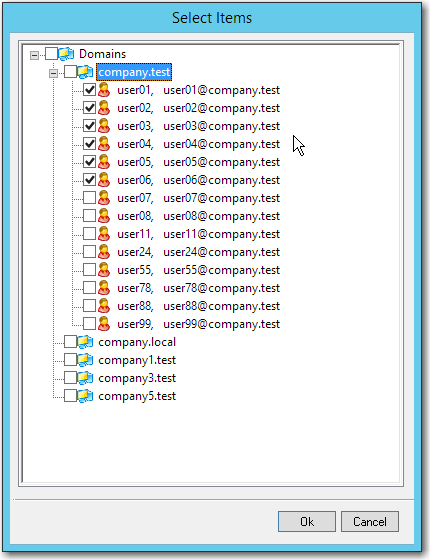
- Click Ok
- Select the Group name from the Group Manager list to open the Group Properties.
- Choose the Account template created above in from the drop down list.
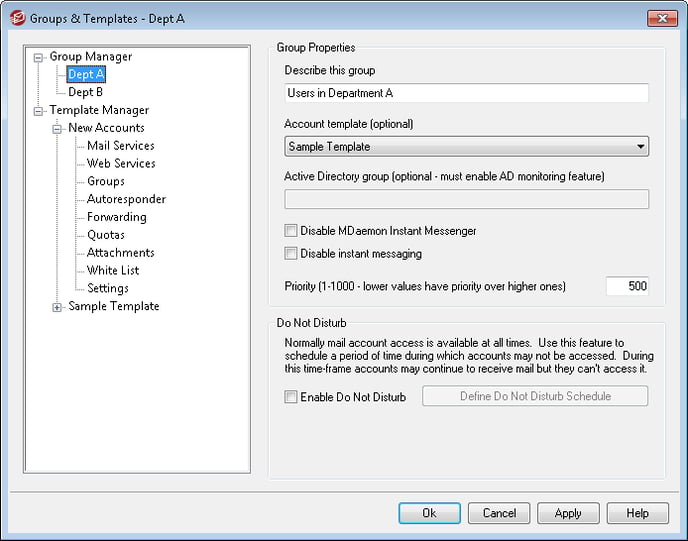
- Click Ok to apply the template to the group.
