Register an application with Microsoft Identity platform:
- Login to the Microsoft Entra ID administration center.
- For accounts with multiple tenants, click the Settings icon and select the desired tenant.
- In the Admin Center menu, select Identity > Applications > App registrations.
- Select New Registration
- Enter an application name in the name field.
- Select Web under the Redirect URI (optional) drop down list.
- Enter https://sg.company.test/auth as the Redirect URI.
- Replace 'sg.company.test' with the valid SecurityGateway hostname.
- Select Register
- Make note of the Application ID.
- Select API Permissions
- Select + Add a permission
- Select Microsoft Graph
- Select Application Permissions
- Select Group.Read.All and User.Read.All
- Select Add permissions
- Click the Grant admin consent for... button.
- Click Yes
- Select Certificates & Secrets
- Click + New Client Secret
- Enter a description in the description field.
- Select the radio button to determine how long the password will be valid for.
- Make note of the generated password in the Value field as this password will not be viewable again.
In SecurityGateway:
- Login to SecurityGateway as the global administrator.
- Select Setup/Users
- Select Accounts
- Select User Verification Sources
- Click New
- Select Microsoft 365
- Enter a description.
- Enter the Microsoft 365 domain name in the Domain Name field.
- Select the Type
- For most configurations, the option will be Global.
- Enter the Application ID from Entra ID (Azure AD )in the Service Principle field
- This can be found on the Overview page of the app registration in Entra ID (Azure AD).
- Enter the password generated in Entra ID (Azure AD) above in the Password field.
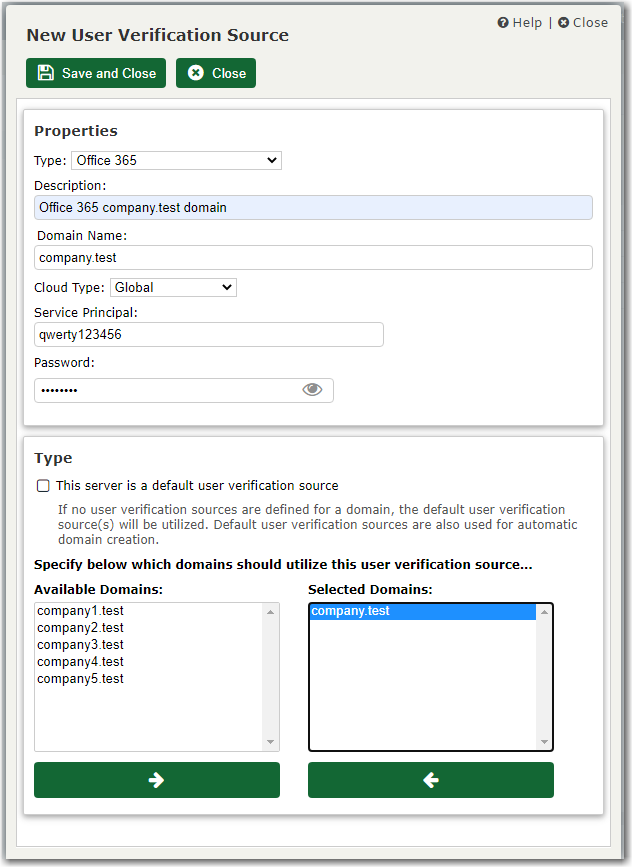
- Click Save and Close